
Maine Central, Lamoille Valley
Click image to link to my web site, nekrailroad.com
Thursday, December 18, 2008
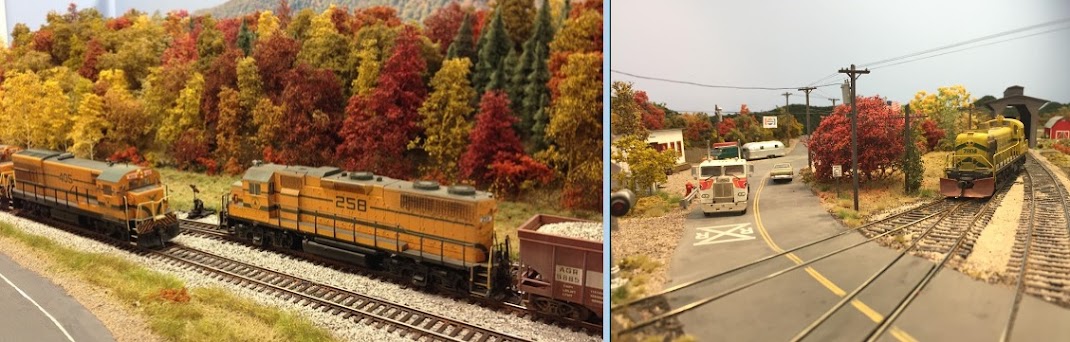
Happy Holidays!
Happy Holidays to everyone out there. Here is a photo I staged on the layout for the season. Enjoy:

Thursday, December 04, 2008
Busy Fall
I have not posted anything since my return from the NER Syracuse convention but that was not because I have not been busy. I hosted an open house on November 22nd and in preparation for that I did a lot of projects and worked quite a bit on the layout. I'll get you up to date on what I've been doing and also discuss what is in the works for this winter.
First, I wanted to make some changes to the layout area, to give it a more finished look now that I completed the other half of the basement (non-railroad family room). So time was spent working on curtains to hang below the benchwork and to install carpeting. I really have enjoyed having this in place as it makes the area so much nicer looking and the carpet feels great under the feet.

The skirting was made from material we purchased and then sewn into panels by my wife. They are all 44" wide, so it is easy to get in where needed. They are attached with clothespins glued to the back of the fascia boards. It is also easy to disconnect the panels at a few clothespins and pull the material back to work without actually removing a whole section. The skirting does a good job of hiding the support legs and the shelving that holds layout supplies and kits. This makes it much more attractive for visitors. I am very happy with the results.

The carpet I installed is made up of 20" square tiles sold in a box by Home Depot. They are ready to lay down onto the concrete floor and include padding. They don't move when put in place but are easily lifted and moved if needed. Installation went real quick and works well for a layout as I only need to carpet the open areas, not under the layout. The squares extend under the skirting a few inches. I can remove sections if I am really doing some dirty work and want to protect them from damage. Here is a look at a section with unfinished benchwork so you can better see how they are placed onto the floor:

These were the main room enhancements. In my next posts, I'll show you some of the locomotive projects I completed as well as some scenery and detailing work done in Hardwick.
Saturday, September 13, 2008
NER Syracuse Day 3
Saturday here and the weather has stayed cloudy with the threat of rain. We got some tips about a lot of CSX westbound traffic moving on Saturday mornings, so we are going to head out and see what we can find before going to the hotel for some clinics and more layouts this afternoon. More to come later today.

LATER: So we spent quite a few hours at an area just west of DeWitt yard watching the trains. It was probably a little lighter today than a weekday, but still plenty of trains for us. We were able to catch the usual CSX power as wel as an Amtrak train. But UP power on one train and BNSF on another was a real treat for us. Mostly I shot video, but here are a few pictures I got whil etrying to juggle the camera and the camcorder at the same time.


A couple trains were manifest freights and I was able to see some older MEC and B&M cars (not the Guiolford versions, but the 1970's schemes. Also going by was this neat Ontario Northland car in original paint plus a CV blue boxcar. You can see it has been relettered for FEC.


After this extended railfan session, we were able to get to a couple of layouts and another interesting hobby shop. Brian Curry's N scale layout was terrific and really shows that great modeling looks great regardless of the scale. The video I took could have easily been an HO or O scale layout if you did not know better,
Now it is off to the banquet to wrap up festivities. I'll post a wrap up entry tomorrow.
Friday, September 12, 2008
NER Syracuse Day 2
Friday starts off cloudy with rain threatening. I registered late for this convention so I am not doing any of the prototype tours this year. Instead the focus will be clinics, layouts and railfanning. After breakfast in the Hampton Inn lobby (got to love that free breakfast buffet they all have!) we headed over to the Holiday Inn convention hotel to get registered. A contingent of NJ Division modelers was found wandering the area (PJ, Bruce B. and Bob P.) and we traded notes on what was seen so far.
Anton and I decided to get some railfanning in before the weather turned bad. This worked well as most layouts did not open until the afternoon anyway. We headed over to Solvay yard where the CSX interchanges with the Finger Lakes Railway. Lots of big industry here such as Crucible Steel, a paperboard mfgr. and several chemical industry receivers. We scoped out the entire area and watched the ex-CR FGLK Quality diesel do some switching, but by now some rain started to fall. It was still early so we decided our best bet was to take advantage of overhead shelter and do our railfanning at the Syracuse Transportation Center, shooting trains from the Amtrak platform. We were quickly rewarded with a CSX train already passing by as we ascended to the platform. Next up was an Amtrak commuter train (Buffalo-Albany). While this was in the station a westbound CSX passed by. We quickly got our cameras repositioned to catch the train.
Listening to the scanner was fun too. There was some back and forth between the ND dispatcher and a work train trying to get track time to do their work. The scanner was vital too to find out when trains were coming of course. Both an eastbound and westbound train were in the area and sure enough the headlight of the eastbound was soon upon us. However the westbound track was now showing a green signal. As luck would have it both trains would be passing right in front of us. I did my best to get a still shot of the eastbound before switching to video to get the westbound.

The scanner talk died off, so we decided to get lunch and head to another trackside location to eat and wait for more trains. As luck would have it we missed two trains while trying to find a suitable spot to park trackside. The first "train" that passed us by was this CSX track car:
Later the Amtrak Maple Leaf snuck up on us but I was still able to grab a shot:

It was then time for some layouts and we headed off to see a nice Pennsy layout featuring Horseshoe Curve. Now, coming from an area outside Philadelphia you might think the last thing that I'd want to go see is a PRR layout. There are plenty back home, so PRR is not high on my must-see list. But this layout was really great. The wharf scene alone was easily 8' x 12' and was incredibly detailed. In fact all the areas were great like this and we were really happy with our decision to visit this layout. (This layout was recently featured in RMC).
We also made a stop a Central Hobby Supply to exchange some money for hobby items and then went to visit a new developing layout that featured many of the areas we have been railfanning. Dewitt Yard, Solvay, CSX, Finger Lakes, it was all here. We could find the places where we stood trackside to take pictures. It will be nice to see how this layout develops once scenery and structures are added.
Back at the convention hotel, we checked out a couple of clinics, including Earl Smallshaw talking about a new section he has finished on his classic layout (one of the structures was scratchbuilt 55 years ago!). A clinic on using photos for backdrops was interesting and made me think about some areas I might be able to incorporate some photos onto the layout. There was time for one more local layout, an N scale D&H, before calling it a night.
Anton and I decided to get some railfanning in before the weather turned bad. This worked well as most layouts did not open until the afternoon anyway. We headed over to Solvay yard where the CSX interchanges with the Finger Lakes Railway. Lots of big industry here such as Crucible Steel, a paperboard mfgr. and several chemical industry receivers. We scoped out the entire area and watched the ex-CR FGLK Quality diesel do some switching, but by now some rain started to fall. It was still early so we decided our best bet was to take advantage of overhead shelter and do our railfanning at the Syracuse Transportation Center, shooting trains from the Amtrak platform. We were quickly rewarded with a CSX train already passing by as we ascended to the platform. Next up was an Amtrak commuter train (Buffalo-Albany). While this was in the station a westbound CSX passed by. We quickly got our cameras repositioned to catch the train.
Listening to the scanner was fun too. There was some back and forth between the ND dispatcher and a work train trying to get track time to do their work. The scanner was vital too to find out when trains were coming of course. Both an eastbound and westbound train were in the area and sure enough the headlight of the eastbound was soon upon us. However the westbound track was now showing a green signal. As luck would have it both trains would be passing right in front of us. I did my best to get a still shot of the eastbound before switching to video to get the westbound.

The scanner talk died off, so we decided to get lunch and head to another trackside location to eat and wait for more trains. As luck would have it we missed two trains while trying to find a suitable spot to park trackside. The first "train" that passed us by was this CSX track car:

Later the Amtrak Maple Leaf snuck up on us but I was still able to grab a shot:

It was then time for some layouts and we headed off to see a nice Pennsy layout featuring Horseshoe Curve. Now, coming from an area outside Philadelphia you might think the last thing that I'd want to go see is a PRR layout. There are plenty back home, so PRR is not high on my must-see list. But this layout was really great. The wharf scene alone was easily 8' x 12' and was incredibly detailed. In fact all the areas were great like this and we were really happy with our decision to visit this layout. (This layout was recently featured in RMC).
We also made a stop a Central Hobby Supply to exchange some money for hobby items and then went to visit a new developing layout that featured many of the areas we have been railfanning. Dewitt Yard, Solvay, CSX, Finger Lakes, it was all here. We could find the places where we stood trackside to take pictures. It will be nice to see how this layout develops once scenery and structures are added.
Back at the convention hotel, we checked out a couple of clinics, including Earl Smallshaw talking about a new section he has finished on his classic layout (one of the structures was scratchbuilt 55 years ago!). A clinic on using photos for backdrops was interesting and made me think about some areas I might be able to incorporate some photos onto the layout. There was time for one more local layout, an N scale D&H, before calling it a night.
Thursday, September 11, 2008
NER Syracuse Day 1
Like last year, I am at the Fall NER Convention and will be posting what is going on here to my blog, at least once a day, maybe more. Day 1 (Thursday) is the drive up to Syracuse NY. I have not been this far west for an NER convention yet (furthest before was Utica, so the area is new to me.
CP Rail modeler Anton M. is joining me for this year's pilgrimage. We made our way into Syracuse by mid-afternoon. We were pacing an NYS&W train along I-81, but were unsuccessful in getting off in time to set up and get a picture. We did get to a good location but just as the engines were passing by. The train was moving! Once in Syracuse proper, we decided to check out the railfanning opportunities and headed towards the west end of the area near Solvay yard. Using the July Railfan & Railroad magazine we found an overpass and a road that put us trackside just east of Solvay yard. I got the scanner set up and soon we heard an Amtrak train approaching and it was quickly upon us. This was quickly followed by a CSX intermodal train. It was pretty easy to figure things out by having the R&R map with CP locations identified. It has been a while since I was able to do some real railfanning where there was a good density of trains and this was fun!

Next we tried to find where the NYS&W moves through Syracuse, and although we did, it was easy to get lost and stuck in downtown traffic. Eventually we maneuvered to CP 286 on the CSX just west of DeWitt yard. We found a good location trackside and were rewarded with a train right away. The scanner picked up notes from the Dispatcher about a train moving from track 2 to track 8 and we were able to see the switches being thrown to do this. Soon the train was snaking through switches and moving past us. The dispatcher was talking to another train with 5 cars for Solvay and soon that too was going past us.

We finished up by scouting out the DeWitt yard area to be prepared for more railfanning later in the weekend. Near the east end we found a god spot to watch as the yard switchers worked a cut of cars using a GP40-2 and a GP38-2.

As it was getting late we decided to head over to the hotel and get checked in. We are not at the convention hotel (it was full when I tried to book), but just down the road at the Hampton Inn. After getting checked in, we looked over the layout book and had time to visit a couple of layouts and get some dinner before calling it a day.
Thursday, July 17, 2008
Caboose Work
I have been in a caboose state of mind lately. Having gotten a few new cabooses over the past year, I decided to round them all up and do some basic upgrades to make them ready for the layout. As I received these, I pretty much just took them out of the box and put out them out there to test run, so they were all still a little shiny and such. They looked a little out of place in relation to my other weathered rolling stock and locomotives.
I started by bringing them all together and taking stock of what I have. I also looked through books and on the Internet for relevant pictures to see what I might need to do as far as details and weathering. One great book is Cabins, Crummies and Hacks: Vol. 1 covering the northeast. Lots of great photos there.

One of the main things I do with all freight cars is to paint the trucks and wheels with rust and grimy black. If nothing else, this (to me) seems to impart the most realism into the model. I use a brush to paint the wheel faces rust and the trucks grimy black. Usually this is enough as the rust dries dark enough to look pretty good. If it is too bright a hit it with a light coat of grimy black. I also take the opportunity to check the gauge of the wheelsets against the NMRA gauge to make sure they are accurate.
I also installed Kadee #58 scale size couplers. I have decided to try to standardize on these, concentrating on locomotives and cabooses first as these are usually most noticeable. Many of the models have the Accumate couplers which I have not really liked to much, in appearance or in operation.
The final standard upgrade i did to all cars is to install coupler cut levers. I use Detail Associates part #FC-6215 for this. I drill the #80 hole for the eye bolt and run the lever through it. I glue the end to the bottom of the coupler box making sure it does not interfere with operation of the coupler. Once dry I painted the lever with grimy black. A small detail to be sure, but it is neat when your eye picks up the bent wire ends of the lever as the train rolls by.
My roster has three B&M cabooses now, with the addition of 2 new Intermountain ones in B&M blue. These are really nice and pretty accurate based on photos I have looked at on-line. For my time period one of the important items to add are the consolidated lube plates an the U-1 wheel stencils (yellow dots). I used Microscale decals to add this to the models, right onto the existing glossy surface. The photos helped me find the proper placement of these items on the models. I checked the weight on these cars. Coming in at 2.5 oz. these cars are a little light (should be 3 oz.). I did not find an easy way to get the body off the underframe and did not want to risk damaging the details. So I will have to see how these perform and add weight later if necessary. The painting, couplers and cut levers finished up these B&M cabooses.

I also have a Athearn RTR caboose, #C23. The Caboose book actually had a great shot of C23, which shows the Athearn paint job is pretty accurate although the model is just close. I took care of the trucks and added the decals to match the photo.
My MEC caboose fleet has been built using the Atlas releases from the past few years. The first release was the wide cupola #670. I unfortunately only picked up one of these when they came out. I should have looked to see if additional road numbers were released, or picked up more and changed the numbers. So far Atlas has not done another release of wide cupola cabooses in MEC paint, although the MEC did have 13 others (numbers 640-645, 651-654 and 670-672). Perhaps another wide cupola caboose will be a future release coming up?
Atlas has since released two runs of standard cupola cabooses in MEC paint. Numbers 656 and 659 came first and have green cupolas. Then 657 and 658 were released in a different lettering scheme with yellow cupolas. Somehow I picked up an extra 656 model, so I used Walthers Solvaset on a q-tip to remove the numbering on the sides and ends and then used Microscale decals from set 87-903 to renumber it to 655 (which I have a picture of in the same paint scheme). I'm not sure of all the standard cupola cabooses the MEC had, but I only have found pictures of 655-659, so I might have all of them covered.
I should point out that none of these is 100% accurate as a MEC caboose model. The MEC caboose have varying windows and none of the steps are correct (the MEC had 3 while the models have 2). I can live with these discrepancies. Other modelers may want to address filling in the extra window(s), although paint matching to hide the work might be tough. And I believe Moloco makes a part to replace the steps with proper, more detailed 3 steps. It is just a question of how much of a project you want to make it.
For each of these I did the usual truck painting, KD #58 couplers and cut levers. These models already had the lube plates, so it was just a matter of adding the U-1 stencils, using prototype photos as a guide. I also checked the weight on each of these. They are just about correct. Being 5 inches long, the NMRA recommended weight is 3.5 oz. and these came in at 3.4, close enough!

I also simulated the end flasher on these caboose by cutting a piece of clear acrylic rod (Plastruct 92031), gluing it to the end and putting a spot of Tamiya Red Clear gloss paint (#X-27) on the end. This does enough to capture the look of the flasher. I also installed sinclair short antennas to the roofs and hit them with Polly Scale MEC green.
 I did notice a problem with the first standard cupola release (656 and 659). These wobble very easily and rock side to side unprototypically. I compared these to the later release which does not exhibit this problem. What I found is that Atlas has molded 2 stabilizing pins into the truck bolster to keep the caboose from rocking. On the earlier release, these pins are not as long as the later release. So Atlas fixed this problem between releases. My fix was to also install longer stabilizing pins using styrene strip, sanded to match the angle of the bolster and glued to the other truck bolster to help stabilize the caboose. I made them a little long and then filed them until the trucks attached and pivoted OK while still keeping the caboose stabilized.
On the 670 wide cupola caboose, I finished up a project I planned to do a while back. While watching videos at one point, I noticed the flashing red beacon on the back of the caboose as the train passed by. I see these on the MEC caboose in the photos as well. I had already picked up a Miniatronics flasher with red LED and Tomar contact wipers. With everyting on hand, I decided to complete the project now. I will be writing this up for the MER Local newsletter and will probably publish the details on my web site. For now, here is a picture of the caboose done and ready for reassembly.

The caboose with the flasher looks pretty neat on the track. There is a little more resistance and less free rolling with the wheels having contact wipers, but this does not seem to be a big deal. It will look nice on the end of the train during the open house in November.

I also have an Athearn recent release of MEC #661. this is neat in that it has the covered window. I limited my work on this to painting the trucks and replacing the couplers.
Not addressed right now are my older pair of Proto 2000 NE style caboose models. I have never liked the orange paint on these - it just looks too orange and not like MEC paint. I am thinking about removing the lettering and masking off the green areas, then airbrushing some MEC harvest gold onto the model. If it looks good, I will then re-letter it. I'll cover that in a future post.

Moving onto the Canadian Pacific, I acquired a couple of the Atlas Trainman "C&O Style" cabooses. Again, these are most likely not 100% accurate for the CP Rail cabooses they represent, nor do they have the level of detail of the other cabooses, but I am OK with them for my layout right now. I added the U-1 stencil above the existing lube plate and also took care of painting the trucks and swapping the couplers for #58s. The rest of the model looks OK, especially for a $12 price tag! Maybe later I will look into a more accurate modern caboose for CP Rail, getting appropriate input from me CP modeling buddy Anton.

My last two caboose to be worked on are the True-Line Trains Central Vermont wooden cabooses. While these do have the CV noodle logo, I am not 100% sure they would have been in use on the Richford Branch in 1980. No matter, my modeler's license allows me to use these models on my layout! For these I added the lube plates, U-1 stencils and painted the trucks. I decided to leave the installed couplers as these are a scale size metal spring coupler that looks pretty good. I'll see how they working operation and replace if necessary.
Now all my caboose models are ready for final weathering. I'll use an airbrush to hit them all with dust and some diluted grimy black. Then I will finish up with some Bragdon chalks for soot, dust and rust.

I started by bringing them all together and taking stock of what I have. I also looked through books and on the Internet for relevant pictures to see what I might need to do as far as details and weathering. One great book is Cabins, Crummies and Hacks: Vol. 1 covering the northeast. Lots of great photos there.

One of the main things I do with all freight cars is to paint the trucks and wheels with rust and grimy black. If nothing else, this (to me) seems to impart the most realism into the model. I use a brush to paint the wheel faces rust and the trucks grimy black. Usually this is enough as the rust dries dark enough to look pretty good. If it is too bright a hit it with a light coat of grimy black. I also take the opportunity to check the gauge of the wheelsets against the NMRA gauge to make sure they are accurate.
I also installed Kadee #58 scale size couplers. I have decided to try to standardize on these, concentrating on locomotives and cabooses first as these are usually most noticeable. Many of the models have the Accumate couplers which I have not really liked to much, in appearance or in operation.
The final standard upgrade i did to all cars is to install coupler cut levers. I use Detail Associates part #FC-6215 for this. I drill the #80 hole for the eye bolt and run the lever through it. I glue the end to the bottom of the coupler box making sure it does not interfere with operation of the coupler. Once dry I painted the lever with grimy black. A small detail to be sure, but it is neat when your eye picks up the bent wire ends of the lever as the train rolls by.
My roster has three B&M cabooses now, with the addition of 2 new Intermountain ones in B&M blue. These are really nice and pretty accurate based on photos I have looked at on-line. For my time period one of the important items to add are the consolidated lube plates an the U-1 wheel stencils (yellow dots). I used Microscale decals to add this to the models, right onto the existing glossy surface. The photos helped me find the proper placement of these items on the models. I checked the weight on these cars. Coming in at 2.5 oz. these cars are a little light (should be 3 oz.). I did not find an easy way to get the body off the underframe and did not want to risk damaging the details. So I will have to see how these perform and add weight later if necessary. The painting, couplers and cut levers finished up these B&M cabooses.

I also have a Athearn RTR caboose, #C23. The Caboose book actually had a great shot of C23, which shows the Athearn paint job is pretty accurate although the model is just close. I took care of the trucks and added the decals to match the photo.
My MEC caboose fleet has been built using the Atlas releases from the past few years. The first release was the wide cupola #670. I unfortunately only picked up one of these when they came out. I should have looked to see if additional road numbers were released, or picked up more and changed the numbers. So far Atlas has not done another release of wide cupola cabooses in MEC paint, although the MEC did have 13 others (numbers 640-645, 651-654 and 670-672). Perhaps another wide cupola caboose will be a future release coming up?
Atlas has since released two runs of standard cupola cabooses in MEC paint. Numbers 656 and 659 came first and have green cupolas. Then 657 and 658 were released in a different lettering scheme with yellow cupolas. Somehow I picked up an extra 656 model, so I used Walthers Solvaset on a q-tip to remove the numbering on the sides and ends and then used Microscale decals from set 87-903 to renumber it to 655 (which I have a picture of in the same paint scheme). I'm not sure of all the standard cupola cabooses the MEC had, but I only have found pictures of 655-659, so I might have all of them covered.
I should point out that none of these is 100% accurate as a MEC caboose model. The MEC caboose have varying windows and none of the steps are correct (the MEC had 3 while the models have 2). I can live with these discrepancies. Other modelers may want to address filling in the extra window(s), although paint matching to hide the work might be tough. And I believe Moloco makes a part to replace the steps with proper, more detailed 3 steps. It is just a question of how much of a project you want to make it.
For each of these I did the usual truck painting, KD #58 couplers and cut levers. These models already had the lube plates, so it was just a matter of adding the U-1 stencils, using prototype photos as a guide. I also checked the weight on each of these. They are just about correct. Being 5 inches long, the NMRA recommended weight is 3.5 oz. and these came in at 3.4, close enough!

I also simulated the end flasher on these caboose by cutting a piece of clear acrylic rod (Plastruct 92031), gluing it to the end and putting a spot of Tamiya Red Clear gloss paint (#X-27) on the end. This does enough to capture the look of the flasher. I also installed sinclair short antennas to the roofs and hit them with Polly Scale MEC green.
 I did notice a problem with the first standard cupola release (656 and 659). These wobble very easily and rock side to side unprototypically. I compared these to the later release which does not exhibit this problem. What I found is that Atlas has molded 2 stabilizing pins into the truck bolster to keep the caboose from rocking. On the earlier release, these pins are not as long as the later release. So Atlas fixed this problem between releases. My fix was to also install longer stabilizing pins using styrene strip, sanded to match the angle of the bolster and glued to the other truck bolster to help stabilize the caboose. I made them a little long and then filed them until the trucks attached and pivoted OK while still keeping the caboose stabilized.
 On the 670 wide cupola caboose, I finished up a project I planned to do a while back. While watching videos at one point, I noticed the flashing red beacon on the back of the caboose as the train passed by. I see these on the MEC caboose in the photos as well. I had already picked up a Miniatronics flasher with red LED and Tomar contact wipers. With everyting on hand, I decided to complete the project now. I will be writing this up for the MER Local newsletter and will probably publish the details on my web site. For now, here is a picture of the caboose done and ready for reassembly.

The caboose with the flasher looks pretty neat on the track. There is a little more resistance and less free rolling with the wheels having contact wipers, but this does not seem to be a big deal. It will look nice on the end of the train during the open house in November.

I also have an Athearn recent release of MEC #661. this is neat in that it has the covered window. I limited my work on this to painting the trucks and replacing the couplers.
Not addressed right now are my older pair of Proto 2000 NE style caboose models. I have never liked the orange paint on these - it just looks too orange and not like MEC paint. I am thinking about removing the lettering and masking off the green areas, then airbrushing some MEC harvest gold onto the model. If it looks good, I will then re-letter it. I'll cover that in a future post.

Moving onto the Canadian Pacific, I acquired a couple of the Atlas Trainman "C&O Style" cabooses. Again, these are most likely not 100% accurate for the CP Rail cabooses they represent, nor do they have the level of detail of the other cabooses, but I am OK with them for my layout right now. I added the U-1 stencil above the existing lube plate and also took care of painting the trucks and swapping the couplers for #58s. The rest of the model looks OK, especially for a $12 price tag! Maybe later I will look into a more accurate modern caboose for CP Rail, getting appropriate input from me CP modeling buddy Anton.

My last two caboose to be worked on are the True-Line Trains Central Vermont wooden cabooses. While these do have the CV noodle logo, I am not 100% sure they would have been in use on the Richford Branch in 1980. No matter, my modeler's license allows me to use these models on my layout! For these I added the lube plates, U-1 stencils and painted the trucks. I decided to leave the installed couplers as these are a scale size metal spring coupler that looks pretty good. I'll see how they working operation and replace if necessary.
Now all my caboose models are ready for final weathering. I'll use an airbrush to hit them all with dust and some diluted grimy black. Then I will finish up with some Bragdon chalks for soot, dust and rust.

Tuesday, June 10, 2008
Lamoille Valley caboose
So I was checking my e-mail and looking at the usual new release e-mails I get from my supplier (Mitch at Hobbies USA) when I scrolled down on the Intermountain July Releases and saw the NE-5 cabooses. Now, I had just received the B&M Blue ones earlier this week, so I was not surprised to see new paint schemes coming, including B&M in maroon. But I was not prepared for item CCS1225, LVRC #200! I cannot believe that they are producing this caboose prepainted and assembled in LVRC yellow with green! I had already planned to custom paint an Atlas NE-style caboose and had been using the undec unit on the back of my LVRC trains. I guess that saves me one custom painting project! Now I have the undec caboose to do something with, though...


Tuesday, March 18, 2008
NJ Division / RPM Meet
Not too much to report on the layout front over the past few months. Lots of other things have been keeping me busy, but I do hope to get to some things as we move into the Spring. Hopefully you'll see that reported here. Anyway, here is a quick update on my model railroad activities.
Last weekend the New Jersey Division MER-NMRA held a meet and also celebrated the Division's 40th anniversary. It was a good time and I think everyone enjoyed the Meet. I appreciated the other NJ Division board members work to make this Meet special with lunch and a birthday cake, as well as coordinating an interesting slide presentation on local railroads. I plan to write up the event for an NMRA publication.
I currently am serving as Superintendent of the Division and recently reported that I will be stepping aside after 10 years serving in that position. I feel I have done my part to strengthen the Division and keep the train rolling. It is time to let someone else step in with fresh ideas and passion to take the Division into its 5th decade. I must admit I am a little burned out. I do plan to keep editing the newsletter for another year, and I'll stay active with the Division of course. But stepping back will allow me to spend some more model RR time doing actual model RRing!
Right now I am getting ready to attend the RR Prototype Modelers Meet in Malvern, PA (outside Philadelphia) at the end of March. I will be giving a slightly modified version of my clinic I gave at the Albany convention, focusing on researching the prototype railroads around St. Johnsbury to plan for my layout. I look forward to presenting again and this will help refine the presentation for the NMRA National in Hartford next summer 2009. This time I plan to include a handout, so I am finishing that up. For those interested I will post a PDF to my web site for download.
So, that's it for now. Talk to you again soon!
Subscribe to:
Posts (Atom)